People will forgive a slightly soft picture. They will not forgive audio they have to work at.
Watch yourself do it. A video looks a bit grainy, you keep watching. A video sounds hollow, echoey, or like it was recorded in a bathroom — you're gone in four seconds, and you probably couldn't say why.
So if you're going to fix one thing this week, fix this one. The good news is that almost everything you need to make your voice sound better on camera costs nothing at all.
What it takes to make your voice sound better on camera
In order. Genuinely in order — the first one outranks the other two combined.
1. How close the mic is. Distance does more to your sound than price does. A cheap mic six inches away beats an expensive mic across the room, every time. Halve the distance and you roughly quadruple how much of you the mic hears versus how much of the room it hears.
2. The room. Hard surfaces bounce sound back at the mic and that's what "echoey" is. Bare walls, a desk, a window, a wooden floor — all of it reflects.
3. The mic itself. Last. It matters, but it matters much less than the two above, and if you get those wrong no mic saves you.
That ordering is the whole post, really. Most people start at three and never get to one — which is why they buy a mic and still don't sound better.
The free fixes, in the order I'd do them
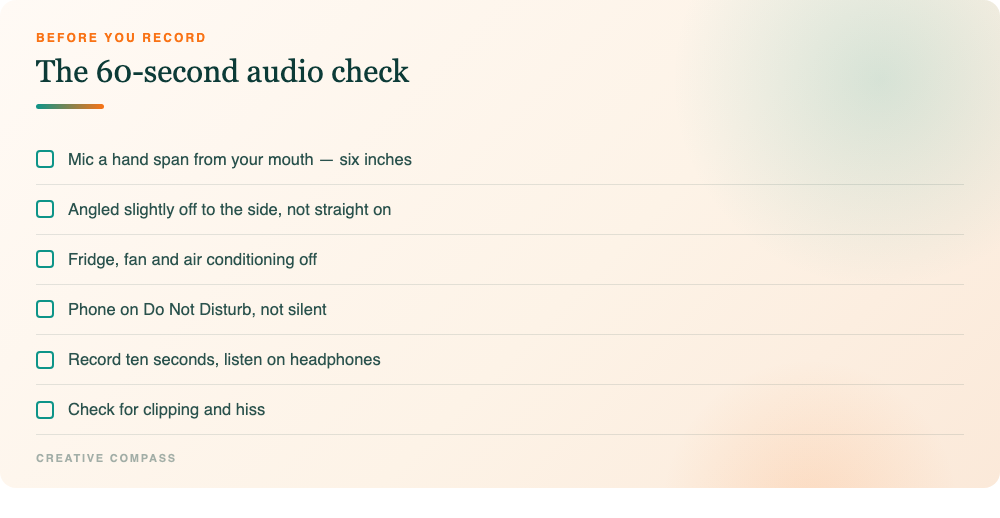
Get within six inches. That's my own rule before I hit record — if the mic is further away than a hand span from my mouth, I move it. On a clip-on, that means on your sternum, not your belt. On a desk mic, that means closer than feels normal.
Put soft things in the room. You do not need acoustic foam. A rug, a sofa, curtains, a bed, a bookshelf with actual books on it. If you can film in a room with a carpet and soft furnishings rather than the nice empty one with the great light, take the carpet.
Turn things off. The fridge. The air conditioning. The fan. You have stopped hearing them and your mic has not. Phone on Do Not Disturb — not silent, Do Not Disturb, because silent still buzzes.
Record ten seconds and listen on headphones. Not the built-in speaker. Headphones. You're listening for two things: clipping, which is that crunchy distortion when you get loud, and hiss, which is the mic straining because it's too far away and turned up too high. Both are fixable before you film and neither is fixable after.
If you are going to buy something
Here's what I actually use, and why. Not a sponsored list — just what's survived on my own sets.
Shure MV7 — USB-C, plug and play, records onto the same track as your video. That last part matters more than people expect: no syncing, no second file to lose. It's my pick for anything recorded at a desk, including calls and podcasting.
DJI Mic — my favourite for quality. Clip-on, discreet, genuinely excellent sound, and the windshield means outdoors is actually viable. The trade-off is that it records to a separate track, so you export and sync. Worth it when the sound matters more than the speed.
Hollyland LARK M2 — the one to look at if the DJI is more than you want to spend. Nine grams, so light you forget it's on, built-in noise cancellation, about ten hours of battery.
Apogee — small, clean, made for voiceover. If you're narrating rather than appearing, it's lovely in a controlled room.
Blue Yeti — the one I point beginners at for calm, close, focused delivery. Adjustable pickup patterns and clear sound without a steep learning curve.
The thing none of these fix is the room. Buy the mic third.
The two noises that spoil otherwise good audio
Once the distance is right, two specific sounds are what's left, and both have cheap fixes.
Plosives are the thump on hard P and B sounds — a puff of air hitting the microphone directly. They're worse the closer you get, which is annoying, because close is where you want to be.
The fix isn't distance, it's angle. Put the mic slightly off to the side of your mouth rather than straight in front of it, so the air passes across it instead of into it. An inch or two off-axis removes nearly all of it. A foam windshield helps too, and costs almost nothing.
Sibilance is the harsh hiss on S sounds. Some voices have more of it than others and it's nothing you're doing wrong. Same fix — angle the mic slightly off-axis, and if you're using a clip-on, make sure it's not pointing straight up at your chin.
Both are worth thirty seconds of testing. Record yourself saying "Peter picked a perfect spot" close to the mic, listen on headphones, then move the mic an inch to the side and do it again. The difference is usually obvious and permanent.
The mistake I see most in video reviews
Whispering.
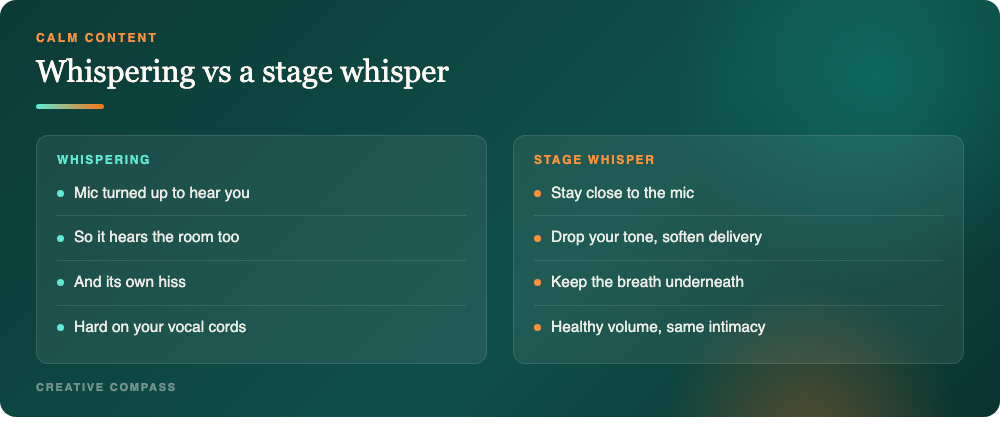
People filming calm content — meditation, wellness, anything soothing — decide that intimate means quiet, so they whisper. Two problems with that. The mic has to be turned up to hear you, which means it also hears the fridge, the room and its own hiss. And sustained whispering is genuinely hard on your vocal cords, which you'll feel if you're filming regularly.
What you want instead is a stage whisper. Stay close to the mic, drop your tone, soften the delivery — but keep your breath and vocal support underneath it. That close, in-your-head feeling comes from proximity and tone, not from volume. You can sound like you're six inches from someone's ear while speaking at a perfectly healthy level, and your throat will thank you in a month.
Pace does more than tone
The last free upgrade, and the one people are most surprised by.
Nearly everyone speeds up on camera. It's the most reliable tell of nerves there is — and it does two things to your sound. Your words run together so consonants get swallowed, which reads as unclear rather than as fast. And you stop breathing properly, which thins your voice and removes the low end that makes you sound settled.
Slow down about twenty percent from what feels right. It will feel laboured while you're doing it and sound completely normal on playback. That gap between how it feels and how it sounds is consistent enough to just plan for.
And let pauses exist. A full stop with a breath after it is the single easiest way to sound like you know what you're talking about, because it signals you're not afraid of the silence. Rushing to fill gaps is what makes people sound uncertain, far more than anything in their actual voice.
Warm your mouth up first
This is the bit people skip and it takes twenty seconds.
Before I step into a voice booth, I warm up my mouth and jaw. The one I always come back to:
"Red leather, yellow leather, red leather, yellow leather."
Say it three times, properly, out loud. It's a workout for exactly the parts of your mouth that make consonants land clearly, and the difference in your first take is audible.
If you want a harder one, try "Shelley swiftly shifts in her seat" three times fast and see what happens. And if you have children in the house you already own the best tongue-twister book there is, which is Fox in Socks.
The reason this works isn't mystical. Your first few sentences on camera are usually your mushiest, because your mouth hasn't done anything demanding yet. Warming up means take one sounds like take four.
Why this is the first thing to fix, not the fifth
Worth being precise about the payoff, because "audio matters" is easy to agree with and easy not to act on.
Picture quality is something viewers evaluate. Audio quality is something they experience. A soft image is a judgement they make about your production; hard-to-follow sound is a small effort they have to make every second, and effort accumulates into a feeling they'll attribute to you rather than to the file. They don't think the audio is poor. They think this is hard work — and they leave.
That's also why audio problems are so invisible to the person who made the video. You know what you said. You can't un-know it, so you can't hear the effort. The microphone's version of your sentence and your memory of your sentence are different things, and only one of them is what the viewer gets.
Which is the real argument for the ten-second headphone test. It isn't perfectionism. It's the only moment where you get to hear what they'll hear, while there's still time to change it.
Get this right once and it stays right — same room, same distance, same settings. A one-time fix that improves everything you make afterwards, which is the best kind there is.
Do this today
Set your mic a hand span from your mouth, angled slightly off to the side. Shut the fridge up. Record ten seconds, listen on headphones, check for hiss and clipping. Say "red leather, yellow leather" three times. Then film the thing you were going to film, twenty percent slower than feels right.
That's the whole job, and none of it needed a purchase.